Guide To Troubleshooting Your UV Steriliser
July 8, 2022 4:07 pm Leave your thoughts
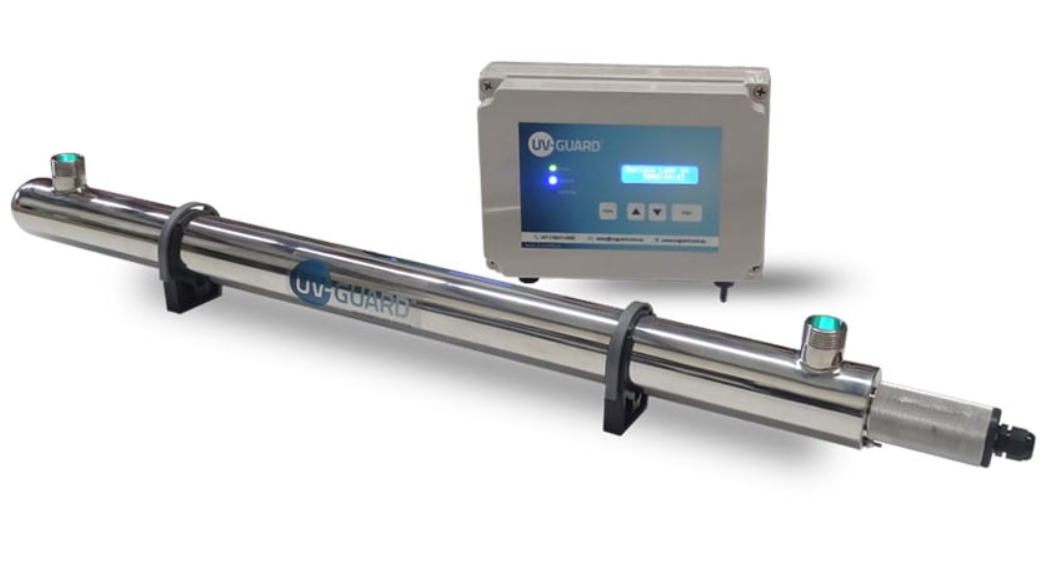
UV Systems are a fantastic option for disinfecting water which may contain pathogens.
They use powerful beams of ultraviolet light to kill or incapacitate 99.99% of the bacteria, viruses, protozoa, fungal spores, and cyst parasites (giardia, cryptosporidium, Cyclospora) in you water supply.
A UV system is ideal for situations where you are using non-chlorinated water from a water tank, bore, dam, or a natural water source.
The only downside of using a UV system is that they are electronic devices which makes them more likely to have installation or maintenance issues. In this guide, we’ll take a closer look at common problems affecting UV systems and how to solve them.
We’ll also share some simple tips for running a UV water filer system and answer the most frequently asked questions from UV system owners.
If you require more assistance, give us a call on 0266468565 or email us at sales@clarencewaterfilters.com.au.
Contents
Trouble Shooting A UV Filtration System
- No Power to Ballast
- Ballast Or Breaker Keeps Tripping
- UV Lamp Is Not Emitting Light
- UV Lamp Is Glowing But Not Igniting
- The UV Ballast Is Buzzing, Beeping or Has Flashing Lights
- There is A Rattling Sound In The UV Chamber
- Leak at inlet or outlet
- Leaks From UV Vessel Endcaps
- Insufficient Water Disinfection
- Brand New UV Lamp Is Not Igniting
Tips For Running A UV Water Steriliser System
Frequently Asked Questions

Trouble Shooting a UV Steriliser System
! Before you begin !
Remember to take care when handling electronic components. Turn the power off at the outlet before you examine leads, plugs, and ballasts for damage. There could be damage that makes these components dangerous to handle while turned on.
No Power to Ballast
1. Faulty power cables, switches, or fuses
Check that the power outlet being used by the ballast is working. Check the condition of leads and check any fuses relating to the power outlet you are using. Look for splits, brown marks, abrasion damage and so on.
2. Ballast or breaker has tripped
A power surge may have tripped a breaker or fuse in the ballast. If that is the case, reset the fuse/breaker.
3. Ballast is damaged
If the ballast is still not working, it may have been damaged. We recommended that you protect the UV controller with a power surge protector to protect from power spikes. Power supplies that have brown outs and irregular or low voltage may also damage the ballast or lamp.
Ballast Or Breaker Fuse Keeps Tripping
1. Connection between lamp and lamp plug is wet
If there is moisture between the lamp and its plug, it could cause a short which trips the ballast or breaker fuse. If moisture is found, turn off the power and unplug all electrical connections and dry the plug/socket.
Next, look for a cause of the moisture before reconnecting. The most common causes of moisture in the lamp socket are:
- Rainfall hitting the unit and pushing through the socket cover (provide more weather protection for unit)
- Condensation running down the electrical cord from the ballast and into the socket (fix by changing position of lead so dew will run off)
- Water leaking through degraded o-rings from the UV chamber into the socket (purchase new o-rings)
- Incorrect components being used (replace the incorrect sleeve/lamp and o-rings)
2. Short-circuit in the electrical assembly
If there is no evidence of moisture, the ballast itself may have a short-circuit and needs to be replaced.
UV Lamp Is Not Emitting Light
1. Check there is power getting to the unit
Make sure the power outlet is turned on and that it is actually producing electricity. Plug in another appliance to check the electrical outlet is still working.
Next, take a close look at the leads that run from electrical outlet into the ballast and then from the ballast into the UV housing. Turn the power off then look for any discoloured, loose, or broken wires and connectors.
Next, check that the ballast’s plug is firmly inserted into the electrical outlet and that it is firmly inserted into the lamp.
If your ballast has a breaker fuse, check that it hasn’t been tripped (only premium ballasts have fuses).
2. Check the UV lamp pins/connector for damage
Turn off the power and unplug the 2 or 4 pin socket that is plugged into the end of the lamp. Look for signs of corrosion, damaged or bent pins, rust, and water ingress. If you find damage, it could mean that the component needs to be replaced.
Next, check that the lamp socket is correctly orientated and firmly seated. Many plugs used with UV lamps must be orientated a certain way to work. Check the distance between each plug to confirm you are putting it on correctly, then ensure that it is firmly seated. It may simply be a matter of the pins not making good contact with the socket.
3. Look for damage to sleeve/thimble or lamp
If your issue is not resolved, undo the housing unit then very carefully take out the lamp and sleeve.
Look for evidence of water ingress which may have damaged the lamp. Water can cause the lamp to short out. If you do see water, look for cracks or chips in the quartz sleeve/thimble, which may be allowing water in.
You should also look at the condition of the o-ring/s as they may be deteriorated and are allowing water to enter the sleeve/thimble. Leaking o-rings are one of the most common causes of water damage to lamps and ballast controllers.
If no water damage is found, scan along the lamp looking for other evidence of damage, like broken filaments or cracks in the lamp glass. Be aware that functional lamps can sometimes have black marks, so that is not always evidence of lamp failure.
If water ingress is found or the lamp looks damaged, you may need to replace the lamp and/or quartz with new o-rings.
UV Lamp Is Glowing But Not Igniting
1. Improper wiring of the fixture or faulty wiring
Take a closer look at the plug going into the UV globe. Check that the orientation of the pins is correct and that they look to be in good condition. Examine the wiring to make sure there are no frayed wires or other problems which may be causing a short. Re-orientate the globe if needed and replace any malfunctioning components.
2. Defective or miss-matched UV bulb/lamp for the ballast
Check that the lamp is correct for your ballast (the ballast might not have enough power to ignite).
UV Lamp Is Repeatedly Turning On and Off
There are several potential causes for a UV lamp to turn on and off intermittently.
1.Give it time
Some long-life bulbs can take several minutes to ignite initially. If you have just inserted a new bulb, it may flicker many times before finally igniting, so give it some time.
2. Loose wires and other electrical issues
Thoroughly inspect all of the electrical wiring and connections used by the system. Turn the power off then check that plugs are firmly connected, look for broken wires, check for corrosion, and make sure the lamp’s pins are undamaged. Replace or repair any damaged components.
3. Check A Backup Lamp
After checking all of the connection, test a backup lamp. If the old lamp works, it ‘usually’ means the new lamp is defective. However, it’s worth noting that a new globe may require more energy to ignite, so a failing ballast may still be responsible
4. Failed Ballast Starter
Most ballasts will have a starter that ignites the UV lamp. If the starter fails, the ballast won’t be able to fully kick start the lamp, which can result in short flashes. If you have another ballast see if that one works.
The UV Ballast Is Buzzing, Beeping or Has Flashing Lights
A buzzing or beeping ballast usually indicates no power being used indicating a problem with the lamp or ballast. Here is how to troubleshoot this common issue:
1. Check the ballast timer
Modern ballasts often have built-in timers which will trigger after a certain amount of time has passed (usually 12 months).
This alarm is designed to inform you that it is time to change globes. If it is the countdown timer, replace your globe and reset the time (refer to the user manual for instructions on doing so).
2. Reset power to the system
Power outages can sometimes cause a ballast alarm to trigger, making it buzz or beep.
To test if this is the case, follow the instructions for resetting your ballast alarm or try power cycling the unit (turn it off then on again). Ballast and UV lamps can be damaged if the power is turned off and on a number of times in a short period of time.
3. Check for bad bulb
Lamp failure is one of the most common causes of a ballast beeping or buzzing. The lamp may have shorted out due to an electrical surge, suffered from water ingress, or failed mechanically.
Turn the system off and remove the lamp. Check for signs of damage like broken filaments, cracks, severe scorch marks, or water inside the lamp/sleeve. If you do notice any issues, replace the lamp.
If the lamp looks fine, you will need to check if it is igniting.
If your UV system has a viewing port, return the lamp to the housing and turn the unit back on. The viewing port will have a blue-purple glow visible is working correctly. This will tell you that the lamp is igniting.
If your system doesn’t have a viewing port, you can use the following procedure to safely test your lamp.
- Turn the UV system off
- Remove the rubber endcap from the unit
- Turn the unit on to see if any light is being emitted near the end cap – remembering to never look at the UV light directly.
It may help to test the globe at night, when light will be easier to see. You can place a white sheet of paper near the end cap, as it will show the blue/purple light emitted by the globe more easily.
If the bulb is NOT igniting, test one of your old bulbs with the unit to determine if the bulb is bad or the ballast is at fault.
You can also test your globe elements with a multi meter if you have one. Follow the instructions on this page. If the gas has escaped from the lamp it will not ignite.
Important note: If you see a blueish-purple light it just means the lamp is igniting. It doesn’t necessarily mean that it is emitting UV light. UV is invisible to the human eye, so a UV metre is required to test a globe is 100% functional.
4. Replace the ballast
If ballast alarm sounds with a new undamaged bulb OR there is no power going from the ballast to the new bulb, then the ballast may be faulty. If you have a backup ballast, test it with your lamp or replace the ballast.
There is A Rattling Sound In The UV Chamber
1. Improperly installed thimble
This only applies to systems that have a single open end and locking nut. As these units rely on the domed end of the thimble to be supported in a locating spring in the enclosed end of the S/S chamber.
A rattling sound in the UV chamber usually indicates that the thimble is not correctly inserted into the housing. The sound is caused by the thimble moving about as water rushes past. It’s important to fix this issue as it may eventually cause damage to the thimble.
To fix the issues, keep the thimble straight and push it in and hold it in place while sliding the o-ring up the thimble so it is touching the thread. Very slowly release the thimble, then screw the end locking cap up. It is essential as a loose thimble can become cracked or chipped.
Leak At Inlet Or Outlet
1. Thread Pipe Fittings Are Leaking
Turn the water supply off, remove fittings and clean threads. Check the fittings for signs of damage to the female threads.
If using fittings without rubber seals (metal on metal or plastic on metal) reapply thread tape and re-attach fittings. No need to apply thread tape if you are using hoses or fittings with rubber seals.
2. Cracked housing
Look for cracks or corrosion on the vessel itself. They could be allowing water out of the unit which gives the appearance of failed fittings.
Leaks From UV Vessel Endcaps
If water is leaking from the endcaps of the unit (which screw onto the ends), check the following:
1. Nicked, cut or improperly seated o-rings
Turn off the unit, unscrew the endcap/s and look at the condition of the o-rings. If they are nicked, cut, flattened, or deteriorated, replace them. It is recommended to replace the o-ring seals every time you remove or clean the quartz thimble or sleeve.
2. Pitting in steel caps
If you live in a location with high levels of salt in the air or water, you may eventually see corrosion of the stainless steel vessel. It often appears as small holes or bumps in the end caps called pitting (which looks like this).
When the pitting is along the area where the endcap seals with the thread or o-ring, it can allow water through, so it leaks from the system and potentially enters the quartz sleeve/thimble. If the pitting is severe, the unit will need to be replaced.
3. Rust, cracks, and corrosion
If your UV steriliser is quite old, it may be deteriorated from years of weather exposure or rough handling. If there are cracks in the vessel, have them repaired or replace the unit.
Insufficient Water Disinfection
If you have tested your water after it has passed through the system and pathogens are still present, it could be one or more of the following issues:
1. Check the order of installation
UV systems must use sediment filtration to remove particles which could reduce UV light from penetrating. A 5 micron sediment filter must be installed before the UV unit.
2. Inadequate sediment removal
If your sediment filter is ineffective, sediment particles could be left in the water which might protect pathogens from exposure to ultraviolet light.
Check the condition of your filter to see if it is still effective. If it is packed with sediment particles, replace it. If your water has a high level of sediment, you may need to run multiple sediment filters with decreasing level of fineness, to achieve good sediment filtration.
For example, if you have sediment-heavy, you might benefit from a 20 micron sediment filter, followed by a 5 micron. This will ensure that most of the sediment is removed. If you are using water from a dirty source, like a dam or lake, you may even need more layers of sediment filtration due to Tannins and Turbidity.
3. Failed lamp
Follow the steps listed above to confirm that your UV light is active.
4. Scratched or cloudy quartz sleeve
Quartz sleeves and thimbles can become coated with mineral deposits and grime over time. This build-up can block light from reaching the water, which impairs sterilisation. Clean or replace
5. Water flow is exceeding capacity of UV system
All UV systems have a maximum flow rate which can be achieved while still reaching 100% sterilisation. If your system is only rated at 20 litres per minute but you are running water at 25 litres per minute, some pathogens may be flowing through without sufficient exposure to UV light.
Brand New UV Lamp Is Not Igniting
1. Give it time
Some new bulbs can take several minutes to ignite. During this period, the lamp may flicker slightly. Give it some time to get going.
2. Look for signs of obvious damage (cracks, filament damage, bent pins)
The lamp may have been damaged in transit. Examine it carefully, paying close attention to the pins, filament and glass tube.
3. Check signs of water ingress
Your quartz sleeve/thimble, o-rings, or stainless steel vessel may be damaged, which has allowed water to touch the lamp or lamp socket. This can cause a short. Replace your lamp and the part of the system which allowed water through.
4. Check Ballast Output
Newer high-performance globes can sometimes take more energy to ignite. If this is the case, the lamp may just glow instead of fully igniting. In this situation, test with a ballast that has a higher maximum power output. If no ballast is available, you can use a multi meter to test ballast output.
Tips For Running A UV Water Steriliser System
Here are a couple of useful tips to make maintaining your UV system much easier:
Hang onto old globes for testing
Keep at least one functional lamp on hand so you can use it for testing your system. The same goes for ballasts. If you have an old ballast that still works, keep it in a cupboard so you can test lamps with it.
Replace your UV steriliser’s gaskets and o-rings regularly
One of the most common causes of UV steriliser failure water getting through an o-ring, which results in a shorted out UV lamp. We recommend changing your o-ring/s ever time you service the system.
Inspect and clean your quartz sleeve/thimble regularly
When you change your lamp, it’s a good idea to also check the condition of your quartz sleeve/thimble. Look for any developing cracks or chips along the length of the quartz. Make sure there aren’t any chips on the open of the sleeve/thimble.
You should also clean off any accumulated minerals, sediment, and debris, as it can block UV light from reaching the water flowing through the unit. The frequency of cleaning will depend on the quality of your water. See the frequently asked questions section for more information on maintaining quartz thimbles and sleeves.
Replace your quartz sleeve/thimble every 3 years
At some point your quartz sleeve or thimble will become too hard to clean and it will take on a cloudy appearance. This will permanently reduce the amount of light reaching the water. This will depend on water quality and local conditions. We carry quartz sleeves for the UVs we sell in the UV Sterilizer Replacement Parts section.
Replace bulbs according to the manufacturer’s recommendations (usually 12 months)
UV lights will see a substantial decrease in light output after a certain period (usually 12 months). At that point, their disinfection capacity will drop off and they will be more likely to fail. Read the manufacturer’s recommendations and keep track of the installation date of your globe. If you buy a UV lamp from Clarence Water Filters, we can automatically send a text message to remind you to replace your globe at 12 months.
Re-check Your Flow Rate If You Make Changes
If you make a change to your plumbing which might increase the flow rate of the water entering your property, check that your UV system is still providing you with enough protection.
Clean pre-filters regularly
If you have a pleated washable sediment pre-filter, remove it from its cannister and clean it every 3-4 months. Wash off sediment using a hose and replace as needed. For most people a 20” x 4.5” pleated washable filter will last between 12 to 18 months if well-maintained.
Monitor Water Supply and UV System Performance
The quality of untreated tank, dam, or river water can change dramatically over time. If the levels of sediment, water chemistry, or pathogenic activity change, it can alter the treatment steps that are needed. Clean out tanks, gutters and catchment surfaces.
A first flush diverter is always recommended to help keep your water supply healthy. It is important to test your water for bacteria if you are concerned.

Frequently Asked Questions
When To Change the UV lamp In A UV Water Steriliser?
Most UV lamps in water sterilisers will need to be changed every 9,000 hours or 12 months. Smaller lamps may only be effective for 6 months. Check your user manual or talk to a professional if you are unsure.
How to Avoid Water Ingress?
- Cracked, cut or poorly fitted o-rings
Check and replace o-rings regularly - Cracked quartz sleeve/thimble
Be careful when handling the quartz and inspect it every time you clean it or change a lamp - Moisture running down electrical cord into socket
It is best practice - Poor water flow (causes lamp to overheat and blow, may also damage ballast)
Change sediment filters as recommended. If using pleated washable filters, clean them as recommended. - Pitted endcaps or cracked housing
Inspect the end caps and housing for damage whenever you replace your lamp.
Do I Need To Clean My Quartz Sleeve/Thimble?
UV systems will have a sleeve or thimble that encases the UV light and protects it from the water flowing through the sterilisation chamber. It is a long hollow quartz tube which is either open at both ends (a sleeve) or at one end (a thimble). the UV light housing.
Over time, mineral deposits and sediment particles will begin to accumulate on your quartz sleeve. This process will eventually reduce the amount of light being transferred into the water, which impacts the effectiveness of your UV system.
You will need to clean these deposits off your sleeve or thimble.
How Often Should I Clean Quartz Sleeves?
How To Clean UV Quartz Sleeve or Thimble?
The precise method for changing or cleaning a quartz sleeve or thimble will vary based on the design of your UV steriliser. However, here is a general procedure for working with a quartz sleeve/thimble.
- Shut off the water supply going to the UV system then open a tap in the house to depressurize the system
- Unplug the ballast power cord (note: There may be an alarm that goes off as a warning)
- Let the UV system cool down for 5-10 minutes
- Remove the protective cover or safety cap which covers the UV globe plug. There may be screws holding a plastic cap or a rubber boot you can simply pull back (refer to user manual)
- Slide the lamp out and remove the 4 pin electrical plug. Make sure the lamp is placed in a safe/clean location
- Unscrew the sealing nut in an anti-clockwise direction and carefully remove it. Be particularly careful if you have a single ended chamber with a UV thimble, as the spring at the end of the chamber may cause it to suddenly push out.
- Remove the sealing nut from the quartz thimble and store it in a safe place.
- Remove the quartz thimble from the housing.
- Wipe the sleeve/thimble down with a methylated spirits or CLR then wash down with water.
- Inspect the quartz for any cracks or chips. If it is still very cloudy, it may need to be replaced.
- Give the Quartz thimble a final wipe down with an alcohol wipe or soft cloth soaked in methylated spirits and give it a moment to dry. Make sure there are no marks on the sleeve. Replace the o-ring or o-rings.
- Reassemble the unit without the lamp installed. Turn on the water to confirm that there is no water ingress into the sleeve/thimble and water leaks under pressure.
- Once you are confident there is no leaks. Reinstall lamp and power up the unit
Do I need to replace quartz sleeves?
The contamination that prevents UV from transmitting through the quartz can eventually degrade the material wall, causing a permanent cloudiness or haziness of the sleeve/thimble. At this point, the quartz sleeve/thimble will need to be replaced.
We recommend that all quartz sleeves should be replaced every 2-3 years. However, if you live in an area of Australia with high TDS levels, you may need to replace it more frequently.
How Do I Change A UV Lamp?
- Unplug the ballast power cord (note: There may be an alarm that goes off as a warning)
- Let the UV system cool down for 5-10 minutes
- Remove the protective cover or safety cap which covers the UV globe plug. There may be screws holding a plastic cap or a rubber boot you can simply pull back (refer to user manual)
- Slide the lamp out and remove the 4 pin electrical plug. Make sure the lamp is placed in a safe/clean location
- Wearing clean cloth or rubber gloves, insert your new globe.
- Power up the unit
Although you can replace the UV globe and continue using the unit, it is strongly recommended that you also clean/inspect the quartz thimble/sleeve and replace the o-rings every time you replace the lamp. This will help to ensure your system is running well and that there is less risk of water ingress occurring.
Wrapping Up
UV Water Sterilisers are a powerful tool for water purification. However, they do require some maintenance to work correctly and enjoy a long lifespan. If you have any questions or need replacement UV parts, get in touch today:
Clarence Water Filters Pty Ltd
Phone: 02 6646 8565
Email: sales@clarencewaterfilters.com.au
Tags: Troubleshooting, UV Systems
Categorised in: Troubleshooting
This post was written by Greg