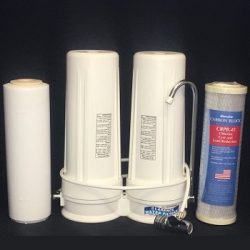
Installation Instructions
- Remove the aerator screen from the tap spout by unscrewing.
- If your spout has an external thread then the diverter valve will screw straight onto it.
If your spout has an internal thread then simply screw the threaded adaptor supplied into the spout before attaching the diverter valve. - When the lever is straight down this allows you to run hot & cold water for washing up.
- To produce purified water simply turn on the cold water tap then turn the lever across, this diverters the water through the filter and out the filter spout.
Flushing of new filters
- Remove the 2nd stage WC04 filter from the housing and screw the housing back on.
- Turn on the new sink tap and leave on.
- Flush the new fluoride filter for 3 – 4 min.
- Turn off sink tap and check for leaks.
- Install the 2nd stage WC04 filter into the housing and flush again for 3 – 4 min.
As the filters are so fine you may have some air bubbles in the water for a few days, this will go away.
- Always lubricate the housing o-ring, a little veggie oil will do.
- Invert system when changing filters (place upside-down and unscrew sumps)
- When upside-down the Fluoride Filter is placed upright into the sump
- Tighten the housing by hand only, as they get tight after use.
- Never filter hot water.
- Maximum filter life is 12 months (FL-051 effective capacity is 1,900L).
- Always flush the fluoride filter before installing the carbon filter.
Your replacement filters can be purchased from Clarence Water Filters.
Stage I FL051 Fluoride filter
Stage II WC04 carbon block filter
CLARENCE WATER FILTERS
W: www.clarencewaterfilters.com.au T: 02 6646 8565 E: sales@clarencewaterfilters.com.au

